Pages

Showing posts with label Baking. Show all posts

Jul 6, 2012

Black Forest Cake - 100th Post(The First Milestone)!!!

Hi guys!!!

Yayyyyyyy!!! I have made 100 posts and that is indeed a great feeling!!! I wanted to post this recipe today coz I am travelling to India after 1 long year and will not be on the internet for about a month. I will be back to blogging from the first week of August!!! I was putting off the Black Forest cake's recipe for a while coz I wanted it to be my 100th post :-)

My husband's birthday was in the first week of June and I had planned on 3 surprises for him. One was a surprise birthday lunch with all our friends, which he found out a day before his birthday from the groceries I had bought!!! Second was his gift. I had hidden it for a couple of days in our wardrobe and managed to keep him looking for it everywhere else, but he found it out exactly 5 minutes before midnite and spoilt that one too!!! The last surprise was the Black Forest cake I had baked. He believed when I told him that our friends were picking up the cake just before coming to lunch. And, this was the only surprise that I actually succeeded in maintaining :-)

Now coming to the cake. I had followed the recipe from Joy Of Baking. Black Forest cake has been one of my favorite birthday cakes for a while now. I was skeptical about actually trying a birthday cake at home but for my first attempt, the cake turned pretty great. I failed to take a separate pic of the whole cake. But I managed to click one slice which I will be posting below.


The Black forest cake generally has 2 or 3 layers of chocolate genoise (A very soft sponge cake) with whipped cream and cherry fillings. The cherry filling is usually prepared with soaking cherries in Kirsch. I just used the syrup that it came in and it still turned out amazing.

Now lets see the recipe.

To prepare the Cherries:
Canned cherries with syrup - 700ml jar
Sugar - 1/4 cup + 1 tbsp sugar

For the Chocolate Genoise:
Unsalted Butter - 3 tbsp
All-purpose flour - 1/2 cup
Unsweetened Cocoa powder - 1/3 cup
Eggs - 4
Sugar - 2/3 cup
Corn flour - 2 tbsp
Vanilla extract - 1 tsp

For the Whipped Cream Frosting:
Heavy whipping cream / Double cream - 600 ml
Vanilla extract - 1 tsp
Sugar - 3 tbsp

Dark chocolate - 200 gms (70% cocoa)

Procedure:

Chocolate Genoise:
1. Preheat the oven to 180C. Line a round cake tin with parchment paper and butter the sides.
2. Beat the eggs and sugar on medium speed till soft peaks form. Add the vanilla extract and beat for another minute.
3. Mix all the dry ingredients separately. Transfer the dry ingredients to the wet mixture in 3 additions and mix thoroughly.
4. Transfer this to the prepared pan and bake for about 25-30 minutes. Transfer the cake to the cooling rack when done and cut into 2 or 3 layers.

This is the picture of the Genoise I baked.


Cherry filling:
1. Drain the syrup and place the cherries in a separate bowl along with 1 tbsp of sugar. Toss well so that the sugar coats the cherries well. You can skip this step if using glazed cherries.
2. Now take the syrup in a thick bottomed vessel along with the 1/4 cup sugar and keep stirring on low heat till the sugar dissolves.
3. Switch off heat and keep the syrup ready. Chop the cherries roughly, reserving about 10-12 whole cherries for the top layer.

Whipped cream frosting:
1. Take the double cream, sugar and vanilla extract in a large mixing bowl and beat on medium speed till stiff peaks form.

Assembling the cake:
1. Brush the cake layers with the cherry syrup that you have prepared.
2. Place the lowest layer on the serving plate. Spread the entire top area with the whipped cream frosting.
3. Now spread the chopped cherries evenly above the cream frosting and place the next layer of the cake on top.
4. Spread the whipped cream entirely to cover the sides and top. (Repeat the previous step if you have more layers)
5. Shave the dark chocolate into fine strips using a chilled knife. Make sure not to touch the chocolate shavings as they melt in the body heat.
6. Now spread the chocolate shavings thoroughly to cover the top and sides of the cake. Place the whole cherries on the top layer.

The yummy Black Forest cake is ready to serve!!! This recipe makes about 12 servings.

Note:
1. This cake tastes best when chilled. You can prepare the cake the previous day and refrigerate it.
2. The cake stays fresh in the fridge for about a week.

Chocolate Banana Bread!!!

Hi guys!!!

I have tried Banana Bread quite a few times and it is a favorite to both me and my hubby. I wanted to try a variation of this simple bread and tried the Chocolate Banana bread recipe from Joy Of Baking. I love that website and have actually baked considerable number of recipes available there. This chocolate banana bread recipe in the site called for some nuts which I excluded. I added some white chocolate chips and on the whole the bread was great!!! The only problem being my impatience :-) I did not wait for the bread to cool down to make the slices. As a result I was left with oddly shaped slices (You will see what I am talking about in the pic below)

Now lets see the recipe.

Ingredients:

All-purpose flour - 1 3/4 cups
Sugar - 1 cup
Unsweetened Cocoa powder - 1/4 cup
Baking powder - 1 tsp
Baking soda - 1/4 tsp
Salt - 1/4 tsp
Eggs - 2
Unsalted butter - 1/2 cup
Bananas - 3
Vanilla extract - 1 tsp
Chocolate chips - 1/2 cup (optional)


Procedure:

1. Preheat the oven to 180C.
2. In a large bowl mash the bananas and combine the lightly beaten eggs, melted butter and vanilla extract. Gently mix these ingredients together.
3. In a separate bowl mix all the dry ingredients together. Using a rubber spatula gently fold the wet ingredients into the dry mixture and combine everything well. Do not overmix, just slightly combine to incorporate all the ingredients together.
4. Finally toss the chocolate chips in and gently mix it in. Scrape down the mixture to the loaf pan and place it in the preheated oven.
5. Bake for about 55-65 minutes or till a tooth pick inserted comes out clean. Mine took exactly 60 minutes.
6. Transfer it to a cooling rack after letting it stand in the pan for atleast 10 minutes. Let it cool completely and then slice (A lesson that I fail to learn after endless attempts!!!)

Serve with evening tea or as breakfast with milk and juice!!! This bread stays fresh for upto 3 days in room temperature.

Jul 2, 2012

Venetian Carrot Cake!!!

Hi guys!!!

The other day I was watching Nigella Lawson's episode on Food Network and could not help but wonder how glowing she is even past 50. I know there would be a bunch of people who might criticize on her shape. But everybody has got to admit that she does look energetic and young for her age. I love her recipes mainly coz they are easy to prepare and she goes with all shortcuts when preparing the food. Who doesn't love that?!!

Anyways, she prepared this amazing Venetian carrot cake in that episode. Until I watched that episode even I thought Carrot cake was American too!!! This Venetian cake is prepared with ground almonds as the base and has no butter at all. The end result is an amazingly soft and moist cake. This is different from dessert cakes in a way that it is not too sweet but is a great accompaniment for tea or coffee.

Now lets see the recipe.

Ingredients:

Ground almonds / Almond meal - 2 1/2 cups
Olive oil - 1/2 cup
Grated carrots - 2 cups
Golden sultanas - 1/2 cup
Sugar - 3/4 cup
Eggs - 3
Vanilla extract - 1 tsp
Ground nutmeg - 1/2 tsp
Pine nuts - 3 tbsp
Lemon - 1/2 (the zest and juice)


Procedure:

1. Preheat the oven to 180C. Line a round cake pan with parchment paper and keep it ready.
2. Toast the pine nuts on low heat on a pan to get it golden coloured.
3. Beat the sugar and olive oil till it turns creamy and airy. Add the eggs one at a time and keep beating. Next add the vanilla extract and beat well.
4. Fold in the ground almonds, grated carrots, sultanas, lemon zest, ground nutmeg and finally the lemon juice.
5. Scrape the mixture to the prepared pan and smooth out the surface. Sprinkle the toasted pine nuts on the surface and place it in the oven.
6. Bake for 30-40 minutes or till the toothpick inserted comes out clean.

Serve warm with tea or coffee!!! This cake when wrapped in plastic wrap can be stored for 3-4 days at room temperature.

Jun 12, 2012

Dried Fruits & Nut Cake!!!

Hi guys!!!

I am big fan of the Christmas Fruit cake. This Dried fruits and nut cake that I am talking about is almost like the christmas cake. It is healthy in so many ways. First off, no butter is used. Secondly, very minimal quantity of flour is used. Best of all, it is loaded with dried fruits and nuts!!! Although I munch on nuts to ease my mid-afternoon hunger pangs, I find it really difficult to get my husband to eat dried fruits or nuts as it is. So, this cake was indeed a great solution. He loved the cake and we enjoyed the cake throughout the week. It actually tasted better a couple of days after it was baked!!!

Now lets see the recipe.

Ingredients:

All-purpose flour - 3/4 cup
Firmly packed brown sugar - 3/4 cup
Eggs - 3
Vanilla extract - 1 tsp
Baking powder - 1 tsp
Baking soda - 1/4 tsp
Salt - 1/4 tsp
Coarsely chopped nuts - 3 cups
(I used hazelnuts, walnuts, cashews, almonds and pistachios)
Diced dried fruits - 3 cups
(Dates - 2 cups + Other dried fruits - 1 cup(I used dried apricots, figs, cherries,cranberries and raisins))


Procedure:

1. Preheat the oven to 150C. Grease a cake pan and keep it ready.
2. In a large mixing bowl add the flour, baking powder, soda, salt, sugar and mix well. Next add the chopped nuts and dried fruits and mix well with using your hands.
3. In a separate bowl beat the eggs and vanilla until they turn light coloured and fluffy.
4. Now add this egg mixture to the fruit and nut mixture and mix well with a rubber spatula till the ingredients are combined well.
5. Scrape down the contents to the prepared pan and bake for about 60-75 minutes.
6. Remove from oven when the cake pulls away from the sides of the pan. Mine was ready at around 65 minutes.

Slice and serve with tea or have it for breakfast. This could be a great power-packed start for the day!!!!

Jun 11, 2012

Garlic Butter Naan!!!

Hi guys!!!

Naan is a very popular Indian flat bread which is very commonly seen in most supermarkets abroad these days. During our weekly visit to the supermarket, I would look at the perfectly puffed up Naans and think that I should try making it at home. But it took really long for me to actually give it a go. The added advantage of making naans is that the dough does not require a lot of raising time thus making it a part of a quick but elegant meal!!!

Now lets see the recipe.

Ingredients:
Yields 5 naans

All-purpose flour / Maida - 2 1/2 cups
Yeast - 1 tsp
Warm water - 1/2 cup
Sugar - 1 tsp
Salt - 1 tsp
Garlic - 4 cloves
Oil - 1 tbsp
Butter - as required


Procedure:

1. Add the yeast and sugar to the warm water and let it sit covered for about 10 minutes or till it turns frothy.
2. Now take the flour and salt in a wide vessel and start adding this yeast water little by little and mix it into a soft elastic dough. the dough has to be sticky now.
3. Finally add the oil and mix well. Keep this covered in a warm place for about an hour.
4. When the dough has risen, divide it into 5 equal sized portions. Preheat the oven to 240C in the broil mode.
5. Generously dust the counter with flour and start spreading the balls into tear shaped naans. Sprinkle the finely chopped garlic cloves over the entire naan.
6. Place the naan on a baking tray with foil and place it directly under the heat source. Cook it for about 2-3 minutes till brown spots appear and it starts to fluff up.
7. Now flip over the naan and cook for another minute and take it out of the oven and immediately spread the butter. Repeat the same with every naan.

Serve hot with any spicy veg or non-veg curry!!!

May 28, 2012

Cranberries & Pistachio Biscottis!!!

Hi guys!!!

Monday hits hard on people who have to return to work. It does seem hard for me as well. My weekends usually start as early as Friday afternoon with my husband coming home for lunch. Then it is 2 days of fun. Either visiting places or just watching one movie after another and lying around lazily all day :-) This weekend was awesome. The weather was great. With clear blue skies, breeze and sunlight till 10 pm... Ahhh!!!! I love such days. In all these 11 months in the UK this is the first time I am seeing consecutive bright and clear days. So we did not waste a single day. Saturday flew by with us visiting a very scenic castle nearby with friends. Sunday was fantastic. We had a barbecue lunch along with a few other friends and it was just awesome!!! After all that fun, I am like the kindergarten kid who cries all the way to school on Monday morning..

I am gonna quit whining about the start of the week and get to the recipe. I love the recipes in Joy of Baking website. I had bookmarked the cranberries pistachio biscotti recipe a while ago and totally forgot about it. Last week, I was going through my bookmarks and found the link again. I got into baking immediately. I loved the fact that these biscottis require no butter in the making. It is just the eggs that bind the whole thing together. The taste was incredible. The only hard part was breaking open the pistachios and chopping them. When my husband was having the last biscotti he asked, "Will there be a box of these on the dining table tomorrow when I get back from work??" I could not help but laugh.

So off to the recipe now.


Ingredients:

All-purpose flour - 1 3/4 cup
Sugar - 2/3 cups
Eggs - 2
Baking powder - 1 tsp
Vanilla extract - 1 tsp
Salt - 1/4 tsp
Dried cranberries - 1/2 cup
Unsalted pistachios - 1/2 cup

Procedure:

1. Preheat the oven to 180C.
2. Beat the eggs and sugar on medium speed till pale and fluffy. It takes about 3 minutes.
3. Now add the vanilla extract and beat for another minute.
4. In a spearate bowl, mix the flour, baking powder and salt. To this add the egg mixture and beat till it is properly combined.
5. Finally add the cranberries and pistachios and fold in gently.
6. Transfer this mixture to a well-floured counter and roll it into a log about a foot long. Place this on a baking sheet and bake in the preheated oven for about 25 minutes.
7. Now take it out and let it cool for about 10-15 minutes. Dial down the oven temperature to 165C. Meanwhile, when the log cools down cut this into 1/2 inch thick cookies.
8. Bake the slices for about 10 minutes and then turn over and bake for another 10 minutes. This ensures that the cookie is crisp on both sides.

Serve hot with coffee or tea!!!

May 18, 2012

Mac & Cheese - with Frankfurters(Chicken Sausages)!!!!

Hi guys!!!

Mac & Cheese is a very popular dish in the US. I have always wanted to try it at home and with the variety of cream cheeses available here it was indeed a piece-of-cake to prepare. I try different versions of pasta at home and picked up a pack of macaroni long back and left it in the pantry. I finally prepared this easy version of mac and cheese a few weeks back.The recipe is very simple 'coz most of the work is done by the oven :-)

Lets see the recipe.

Ingredients:

Macaroni - 2 cups
Philadelphia cream cheese - 200 gms
Milk - 1/4 cup (approx)
Pepper powder - 1 tsp
Salt - 1/2 tsp
Frankfurters(Chicken sausages) - 5
Olive oil - 1 tbsp
Breadcrumbs - 2 tbsp (optinal)
Cheddar cheese - 1/4 cup (optional)


Procedure:

1. Cook the macaroni as per package instructions. Strain the water and set aside.
2. Preheat the oven to 180C. Grease a baking dish or pyrex bowl and keep it ready.
3. Mix the cream cheese, milk, salt and pepper in a separate dish. Heat the oil in a pan and shallow fry the sausages and keep them ready too.
4. Add the cooked sausages to the cheese mixture. Finally add the cooked macaroni to this and transfer the whole content to the baking dish.
5. Grate the cheddar on the top and toss the breadcrumbs too. This is totally optional. Pop the dish onto the oven and cook for 15 minutes.

Serve hot with just ketchup or plainly as it is!!!

Apr 20, 2012

Garlic Pull-Apart Rolls!!!

Hi guys!!!

I am a big fan of garlic breads. So is my husband. We like every version of it.. the native Italian thin flat version or the chunky version from any chain pizzeria.. When I came across the garlic pull-apart rolls recipe in Nag's space I knew I had to try it. Even if I could not succeed in achieving firm holding rolls, they turned out gorgeous and unbelievably yummy!!!

The recipe is simple and the rolls taste great with tea. This can also be used as an appetizer and is sure to win praises!!! Now lets see the recipe.


Ingredients:
Makes 8 rolls

All-purpose flour - 1.5 cups
Warm Water- 1/2 cup + 1 tbsp
Yeast - 1/2 tbsp
Salt - 1tsp
Sugar - 1 tbsp
Olive Oil - 1 tbsp + 1 tsp

For Garlic Spread:
Salted Butter - 6 tbsp
Garlic - 2 tbsp or 5 big cloves (Grated/Minced)
Chopped coriander leaves - 2 tbsp
Powdered pepper - 1 tsp


Procedure:

1. Add the sugar and yeast to the warm water and set aside for 10 mins or till it turns frothy. Once it is ready add it gradually to the flour and salt and knead into a smooth dough.
2. Add the oil and knead well. Keep this covered and let it rise for atleast an hour.
3. Meanwhile prepare the garlic spread. Mix all the ingredients together and keep it handy.
4. When the dough has risen, punch the air down and divide it into 2 equal parts.
5. Spread each into half an inch thick rectangle and spread the garlic spread and roll it from one end to other.
6. Cut this into 4 pieces. Repeat the same with the other part as well.
7. Preheat the oven to 180C and place all the prepared rolls in a greased pan and bake it for 25-30 minutes. Mine was ready exactly at 30 mins.

Serve hot with tea or an appetizer.

Note:
You can either egg wash or brush the rolls with milk to get an even golden brown on the outer sides. This is an optional step. I used to milk for my rolls.

Apr 12, 2012

Blueberry Muffins!!!

Hi guys!!!

It took me so long to finally try baking my first batch of muffins. I have always loved muffins unlike my husband. Everytime I walk into Starbucks I get myself a muffin. I used to be so attached to the white chocolate muffin, but once I tried the blueberry muffin that has been my favorite.

I had a pack of blueberries in my fridge and wanted a way to finish it up. Though I pick up a combination of different berries every week hoping to force myself to eat them, I end up preparing something with it instead of having them fresh. These blueberries totally convinced me into preparing the muffins.

This being my first batch of muffins I was so eager to have my first bite. Baking is indeed therapeutic 'coz when you have a sample of your baked item you are in cloud nine. I loved the texture of the muffins and I even succeeded in making my husband eat them :-)


The thing I liked about baking muffins was the entire process was 30 mins. Preheat the oven and meanwhile mix up all the ingredients. Bake it for 25 minutes, let it cool and indulge in these beauties!!!!

Now lets see the recipe.

Ingredients:
Makes 12 muffins.

All-purpose flour - 2 cups
Baking powder - 2 tsp
Sugar - 1/2 cup
Butter - 4 tbsp (melted and cooled)
Egg - 1
Milk - 3/4 cup
Blueberries - 1 cup


Procedure:

1. Preheat the oven to 180C.
2. Wash and pat dry the blueberries and roll them in some flour taken in a kitchen towel and set aside.
3. Mix all the dry ingredients in a bowl.
4. Slightly beat the egg in a separate bowl using a fork. Now add the melted butter and milk and mix it lightly.
5. Now add the wet mixture to the dry mixture and just mix till incorporated using a spatula. Do not over mix or beat. A few lumps are acceptable.
6. Finally add the blueberries and very carefully mix it up. If you over mix at this stage you will end up with a blue batter.
7. Line a muffin tray with cup-cake liners. Transfer the batter to the muffin tray with a spoon until each is about 2/3 full.
8.Pop it in the oven and bake for 25-30 minutes. (Mine took exactly 25 minutes. You will know its done when its turned golden brown). Let it cool in the tray for 10 minutes and remove the muffins.


These muffins can make a great accompaniment for tea or can be had for breakfast as well!!!

Apr 10, 2012

Cheese and Onion Puffs!!!

Hi guys!!!

I have always loved puffs, whatever the filling may be. Everytime I go out with my mom around the tea time in the evening we stop at some local bakery and grab a few puffs (veg or egg) to accompany the tea or coffee that we manage to get on time. That used to be a regular thing we did on our day outs. Ahhhh... I miss my mom and our day outs :-(

Anyways, back to the puffs. I have always wanted to try making puffs at home. The task cannot be any more simplified with the ready-made pastry sheets that are available here. I have also bookmarked a few sites and videos that explained how to achieve good pastry sheets at home. I am definitely going to try them but not yet. I certainly am not a very patient person and these ready-made sheets come in handy.

The first time I had cheese and onion puff was here in the UK. They are available at every bakery and even in the baker sections of the big supermarkets. They taste just great and is relatively easy to prepare too.

Lets see the recipe.
Makes 4 puffs

Jus-Rol Pastry sheet - 1 no
Onion - 1 big / Onion powder - 1 or 11/2 tsp
Cheese - 1 cup grated
Salt - a pinch
Pepper powder - 1 tsp


Procedure:

1. Roll out the pastry sheet as per instructions and cut them into 4 rectangular pieces.
2. Mix the onions, cheese, salt and pepper in a bowl and set aside.
3. Preheat the oven to 200C.
4. In each piece of the pastry sheet place enough cheese and onion mixture and seal them around by folding over.
5. Bake this for 15-20 minutes or until the top is golden brown. Mine took close to 17 minutes.

Serve with ketchup. Makes a great accompaniment for tea.

Mar 23, 2012

Molten Lava Chocolate Cake!!!

Hi guys!!!

Ever since I had my first molten lava cake in Dominos a few years back, this has always been high in the list of my favorite desserts. Although it took this long for me to try baking one at home. I did not buy ramekins till a few weeks back, so my first attempt was in coffee mugs. I just filled the mug around 1/4 th full with the batter and baked for less than 15 minutes. That turned out great too. But baking these little chocolate babies in the ramekins makes it even more appealing. Trust me, this could be the yummiest baked good that is prepared from start-to-end in less than half an hour!!!!

I wanted to take pics of the gooey center but both of us were going nuts on these cakes as soon as they were done :-) But I hope you can still make out the center in this pic as well. Now lets see the recipe.

Ingredients:
Fills about 4 ramekins.

Baking chocolate (Dark/Milk) - 120 gms
Butter - 100 gms + for greasing ramekins
Eggs - 2
Sugar - 1/3 cup
All-purpose flour / Maida - 1/4 cup


Procedure:

1. Preheat oven to 180C.
2. Melt the chocolate either in a microwave or a double boiler. Add the butter to the melted chocolate and mix well till it melts completely.
3. In a mixing bowl break the eggs and add sugar. Beat them till soft and fluffy.
4. Add the chocolate mixture to the egg mixture and toss in the flour as well. Mix till all the ingredients are well incorporated.
5. Grease the ramekins and pour the mixture till about 3/4th full. Pop it in the oven and bake for 10-15 minutes. Stop baking at around 12 minutes for gooey center and continue till 15 minutes for stiff center.

Serve warm with Vanilla ice cream or just dig in as such!!!!

Mar 7, 2012

Simple Butter Cake!!!

Hi guys!!!

It has taken me almost half a year to finally try baking cakes. For a while now I have been bookmarking easy cake recipes but never really gave it a serious thought. Finally, I thought I will try the simple butter cake. I wanted to start with this cake 'coz when I was browsing for cake recipes I came across pics of butter cake that reminded me so much of a soft, airy, melt-in-the-mouth vanilla cake my dad used to buy from a local bakery named 'Harini Bakery' back in my hometown. Those cakes were too yummy to resist and I thought I should try and replicate them at home. I was pretty happy with the result 'coz my cake did turn out real soft and tasty. Atleast, a great outcome for a first attempt, I'll say!!!!

Now lets take a look at the recipe.

Ingredients:

Unsalted butter - 250 gms (at room temp)
Granulated sugar - 1 cup
All-purpose flour - 1 3/4 cup
Baking powder - 1 tsp
Eggs - 4 large
Vanilla extract - 1 tsp
Salt - 1/2 tsp
Milk - 4 tbsp
Assorted nuts - 1 cup (chopped) (this is optional)


Procedure:

1. Preheat the oven to 180C. Butter and flour a 20 cm cake tin and set aside.
2. Take the butter and sugar in a large mixing bowl and beat it together in medium speed till it turns pale and creamy. It is in the right consistency when it turns almost whitish pale.
3. Now break in each egg and beat for a minute till the mixture turns real creamy and frothy. The eggs need to be at room temperature.
4. Now add the vanilla extract and mix well.
5. Sieve in the flour, baking powder and salt to the wet mixture and beat it in medium speed. Make sure not to make the mixture very airy.
6. Finally, add the milk and mix it well with a spatula. Now pour the prepared cake mixture into the greased cake tin and even out the surface. Add the nuts if using and pop it in the preheated oven.
7. Bake for around 50-60 minutes. At around 30 minutes, when the cake has risen nicely, u can pull the tin out and make a straight incision half way through the cake to let it bake evenly.
8. The oven heat needs to be consistent and works differently in different ovens. So make sure to keep an eye from 45 mins. Check it with a fork or a tooth pick and pull it out of the oven when down.
9. Let it sit on a cooling rack for 15 mins and invert it out of the pan.


Slice and enjoy!!!

Sending this to the Cakes, Cookies and Desserts event hosted by Anjali.


Mar 6, 2012

Banana bread!!!

Hi guys!!!

After an amazing week's vacation I had to drag myself to sit and blog today :-) A wonderful vacation going around places and most important of all sparsely cooking at home, it really has been difficult to get back to the routine. Anyway I have been baking whenever I had time. Baking has been my most sought out time-killer!!! I love everything about baking and most of all the aroma that fills the house.

I have long wanted to try baking banana bread but finally tried it last week for an evening snack. Before the loaf  had actually cooled down, Ganesh and I finished it up fully :-) Right from the moment we finished the loaf, he has been asking me when I am gonna bake this again :-) It was just yummy and I am definitely gonna make it a regular dish. Now lets see the recipe.

Ingredients:
Makes a single 9 inch loaf

All-purpose flour - 1 3/4 cups
Granulated sugar - 3/4 cup
Baking powder - 1 tsp
Baking soda - 1/4 tsp
Salt - 1/4 tsp (optional. skip if using salted butter)
Eggs - 2 large
Butter - 1/2 cup melted and cooled
Vanilla extract - 1 tsp
Ripe bananas - 3 (mashed well with a fork)


Procedure:

1. Preheat the oven to 180C. Take a loaf pan and butter the sides and bottom and keep aside.
2. In a large mixing bowl, mix together the flour, baking powder, baking soda, sugar and salt if using.
3. Take another bowl and break the 2 eggs into it and whisk it lightly with a hand whisk or just a fork. Do not beat the egg too airy 'coz this might cause very hard bread.
4. Now add the vanilla extract, melted butter and mashed bananas into the eggs and mix well till incorporated.
5. Now add the wet mixture in 2 portions to the flour mixture and mix well. Again, make sure not to over mix. Just mix till the ingredients are well incorporated and no dry flour is still left.
6. Add the mixture to the prepared loaf pan and even the surface. I left a few chunks of banana and that did feel good when chewing the loaf. The mixture needs to be upto 3/4 of the pan.
7. Now pop the loaf pan into the preheated oven and bake for 50-60 minutes or till the fork inserted through the middle comes out clean. Mine took around 50 minutes.
8. Let it cool for 15 minutes and remove from the pan.

Yummy banana bread is ready. Serve it warm with tea and see how the loaf disappears in minutes!!!!

Note: You can add some toasted nuts to the bread if preferred.

Feb 20, 2012

Homemade Pizza Margherita!!!!

Hi guys!!!

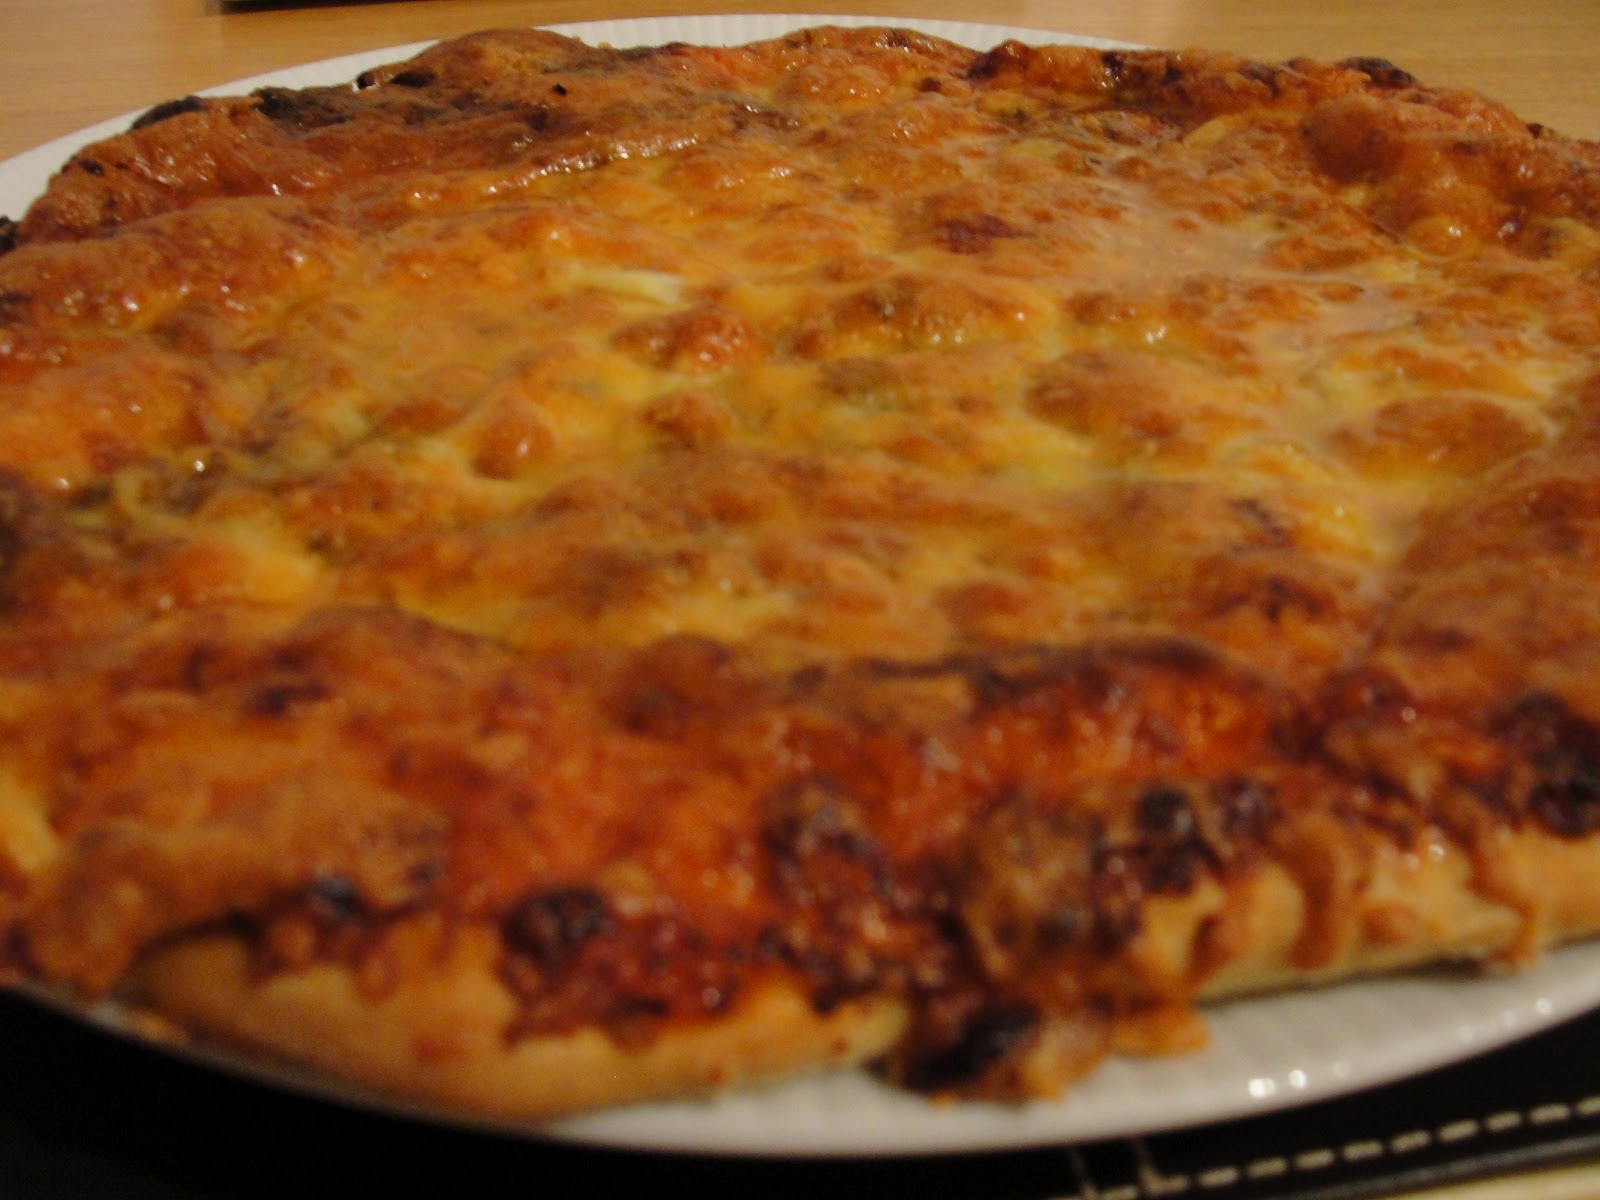
Ganesh and I are die-hard pizza lovers. We have tried pizzas in authentic Italian restaurants to every other countries' version selling restaurants. The only thing left is to have pizza in Italy itself :-) Anyhow.... whatever the version, according to me pizzas are to die for!!!!

I have tried quite a few varieties of pizza toppings when baking them at home. But hands down, my all-time favorite is the basic pizza margherita. The divine combination of tomato and cheese!!! This year being the first Valentine's day with Ganesh, I prepared a special dinner. It was a while since I prepared pizza at home and for a couple of weeks Ganesh was asking me to prepare it over a weekend. So I decided to do that on Valentine's day :-)

This pizza is easy to prepare even if every important part of it is prepared from scratch. But there is an even quicker version when u opt to use some store-bought products. I am gonna explain both the quicker and from-the-scratch methods.


Quick version:

Ingredients:

Store-bought pizza base - 1
Hot & Sweet tomato sauce - 2 tablespoons
Grated mozarella - 1 cup ( Can be even more generous for a more cheesy topping)
Italian seasoning & Oregano - 1/2 tsp each

Procedure:

1. Preheat the oven to 180C.
2. Line a baking sheet with foil and sprinkle some maida/APF on the sheet.
3. Place the pizza base on the sheet and spread the tomato sauce all over it. spread the grated cheese evenly on top of the pizza and sprinkle the seasonings on top.
4. Pop it in the oven and bake for 20-25 minutes or until the edges turn brown and the cheese has melted and turned bubbly.
5. Take the pizza from the oven and slice them and ENJOY!!!!!


Detailed version:

Ingredients:

For the pizza dough:
Maida / APF - 1 cup
Salt - 1 tsp
Sugar - 1 tsp
Active dried yeast - 1/2 tsp
Luke-warm water - 1 cup
Olive oil - 2 tsp

For the pizza sauce:
Tomato - 1 big
Onion - 1
Garlic - 2 cloves
Tomato ketchup - 1 tbsp

Grated mozarella - 1 cup
Italian seasoning/Oregano - 1/2 tsp each

Procedure:

1. Add the sugar and yeast to the luke-warm water and cover and let it aside for 10 minutes. Wait till it turns frothy.
2. Take the flour in a mixing bowl and add the salt. Add the water with the yeast and knead well to form a soft elastic dough.
3. Finally, add the olive oil and knead thoroughly. The dough should be really soft and elastic. Now, close the bowl with a wet towel and let the dough rise for a couple of hours. Prepare the dough earlier that day so u can use it when baking. It can also be prepared days ahead and frozen.
4. To prepare the pizza sauce, heat a tsp of olive oil in a kadai. Add the chopped onion, tomato and garlic to it and saute well. Turn off heat and let it cool.
5. Once cooled down, grind it well into a paste. Add the ketchup and pulse the mixer to get it mixed well. Now, the sauce is ready.
6. Preheat the oven to 180C when preparing the sauce.
7. Line a baking sheet with a foil.
8. The dough would have risen by now. Sprinkle the kitchen stand with flour and rava and try and spread the dough into a circular base. My pizza bases are never perfect circles and I don't care about that 'coz before u know the whole pizza is gone from the plate. So why worry about the shape!!!
9. Now place the base on the sheet and spread the pizza sauce all over the base. Sprinkle the grated cheese throughout the base and finish it with the seasonings.
10. Pop it in the oven and bake for 20-25 minutes or until the edges brown. The cheese sure would be bubbly and melted throughout by now.


The pizza is ready. Take it from the oven and ENJOY!!!!


Feb 16, 2012

Almond & Anise Biscotti!!!!!

Hi guys!!!

Ever since I had biscotti in an Italian restaurant with a super strong coffee I have become a big fan of biscottis. The difference between the usual cookies and the biscottis is that u bake the latter twice. Also, the biscottis are very crispy just like any other cookie but it sure is not dense and heavy. The "airy" look of them makes it irresistible. You guys might actually be able to understand the meaning of "airy" if u have had biscottis before or baked them. Anyhow... these evening treats are perfect with tea/coffee or to just munch on as it is :-)

There are numerous variations and types of biscottis and I started off with a basic spiced biscotti. The anise adds a great aroma and flavor and the nuts do add up to the taste. The recipe is fool proof and these measures yield about 2 dozens of yummy biscottis. Now lets see the recipe.

Ingredients:

All-purpose flour - 2 cups
Sugar - 3/4 cup
Butter - 1/2 cup (at room temperature)
Salt - 1/2 tsp
Baking powder - 1/2 tsp
Eggs - 2 (at room temperature)
Vanilla extract - 1 tsp
Star Anise - 1 tsp grounded
Almonds - 1 cup shredded


Procedure:

1. Preheat oven to 180C.
2. Beat together the butter and sugar till the sugar is almost dissolved and the mixture turns pale and creamy.
3. Next add the eggs one at a time followed by the vanilla extract and beat well. The mixture should become fluffy, creamy and look almost white. Sure takes a few minutes. People without mixers have to bear the hand pain. I used a hand whisk and thought I burnt the calories that I was gonna gain from the biscottis ahead :-)
4. In a separate bowl mix the flour, salt and baking powder well so that they are mixed evenly. Then add this flour mixture to the egg mixture and whisk. Keep mixing till all of it is well incorporated.
5. Finally add the star anise powder and the chopped almonds and mix thoroughly.
6. Now roll out the dough in the shape of a log and place it on the baking sheet and pop it in the oven.
7. Bake for about 25-30 minutes till the outer layer turns golden brown. Now, remove the sheet and let the log cool.
8. Once cooled, cut the log into half inch thick slices and place them back in the baking sheet and bake for around 10-15 minutes. After which, you turn over the sides and again bake for 10-15 minutes. This makes the biscottis evenly crispy.

By now the house will be filled with the heavenly smell of the biscottis. You can take them off the oven and without waiting for it to cool down can enjoy like I did!!!! Store in an air-tight container and enjoy for a few more days ( in my case just 1 extra day :-) )


Jan 12, 2012

Simple Butter Cookies!!!

Hi guys!!!

I am here with my first recipe. I tried to bake some butter cookies yesterday and am glad they turned out really well in the first try... Yay Me!!!!!

What I loved most about baking the cookies was the aroma that filled the entire house. And, I loved the reaction on my husband's face when he took his first bite. What is more worth than that compliment :-)

The whole process took close to 30 mins. Yes my friends you can bake these wonderfully easy yet very very tasty cookies in less than no time.So here goes the recipe:

Ingredients:
Ghee/Butter - 1/2 cup
Sugar - 1/2 cup
All purpose flour - 1 1/4 cup
Baking powder - 1/2 tsp
Salt - a pinch


Procedure:
1. Preheat the oven to 180C.
2. Mix together the sugar and ghee/butter till u get a creamy texture.
3. Blend the dry ingredients (flour, baking powder and salt) separately.
4. Now add in the sugar mixture to the flour mixture and knead to form a dough. Something like the chapathi dough. The dough must be a little sticky so adjust the flour accordingly.
5. Place an aluminium foil on a baking tray. Make small balls , slightly flatten it and place it on the baking tray and bake for just 10-12 minutes depending upon your oven. mine took 12 minutes.
6. You will know that it is done when the cookies start leaving the tray and the outer layer starts to become golden brown. The cookies will be soft when u take them out but once cooled they will be crispy.
7. Cool and store it in an air tight container.

This recipe yields around a dozen cookies.

Bake these delicious butter cookies and enjoy as a tea time snack.
Related Posts Plugin for WordPress, Blogger...